
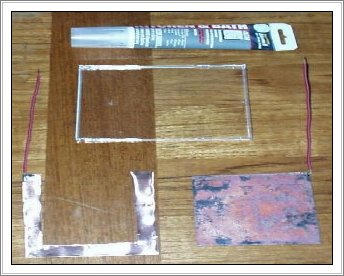
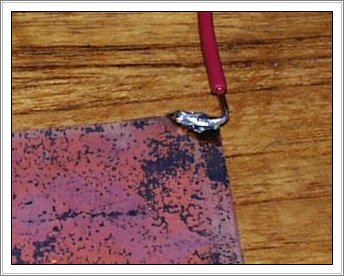
The first step is to make a cuprous oxide plate like we did in the first solar cell. This time I sanded one corner clean all the way down to the shiny copper, and soldered an insulated copper wire to it for the negative lead.
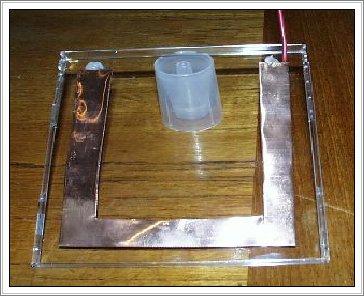
The first step in construction is to glue the U shaped copper plate to the plastic window. Use plenty of silicone glue, so the saltwater won't leak out. Make sure that the solder connection is either completely covered with glue, or is outside of the glue U, as shown in the photo (completely covered in glue is best).
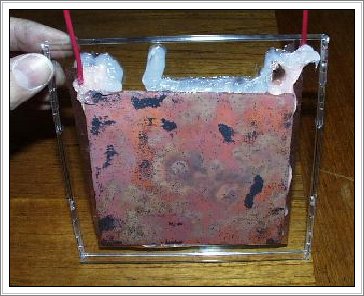
The photo below shows the back side of the solar cell (the side not facing the sun) at this point in the construction.
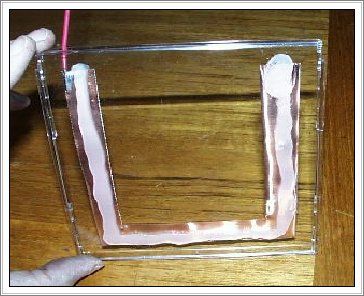
The next step is to lay a good size bead of glue onto the U shaped clean copper plate. This layer will act as an insulator between the clean copper plate and the cuprous oxide plate, and must be thick enough to leave some room for the saltwater. Again, not all of the copper is covered, so there will be plenty of copper in contact with the saltwater.
Gently press the cuprous oxide plate onto this layer of glue. You should press hard enough to make sure the glue seals off any gaps, but not so hard that the two plates touch.
The photo below shows the back side of the solar cell (the side not facing the sun) at this point in the construction.
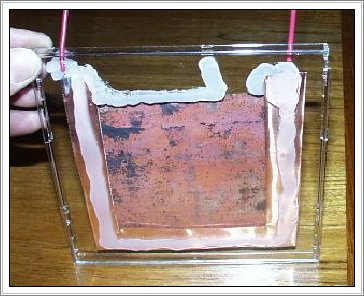
You can click on the photo above to get a bigger picture. Not shown in the photo is a generous extra bead of glue all around the outside of the plates, to ensure that no saltwater will leak out. Allow the glue to cure before going on to the next step.
Next, use a large eyedropper to add the saltwater. Fill the cell up almost to the top of the copper plate, so it almost spills out. Then seal the funnel with another generous bead of glue, and allow the glue to cure at least a half hour.


New SOLAR CELLS
What is the [in situ] solar cell process?
That is the big breakthrough in solar cell design that drops the cost of solar power to $90 per kilowatt. Actually, the [in situ] (Latin for in place) technique is stunningly simple. Instead of refining the silicon and then building cells, you build the cells first and then refine the silicon.
The process generates a cell from ordinary beach sand (silicon dioxide). After cell fabrication, the sand is chemically treated. The reaction drives off the oxygen, leaving an almost pure polycrystalline silicon. Most conveniently. any remaining impurities rearrange themselves to form uniformly doped series connected p.n. junctions through a process celled Barefoot Layering. For each centimeter of cell thickness, you typically get several hundred series p.n. junctions or about 120 volts dc under normal sunlight. The thickness of the panel determines the voltage and the area the current. Typical current densities are four amperes per square meter of panel!
You can easily build a 100 watt cell. Simply take an ordinary metal cookie sheet, cover it uniformly with a 1 centimeter thick layer of beach sand, cover that with a piece of screening for the front collector, add a protective glass cover, and clamp everything together with large rubber bands, bungee cords, or something similar.
To do your final chemical refinement, carefully remove the glass cover and spray the sand with two liters of 3,7 Dimethylpentadecon-2-ol Propionate (available from larger organic chemical supply houses). [If any body finds a source for this let me know.] An ordinary window cleaner bottle makes a handy spray source. Reaction time is four hours, Since the reaction is photoisentropic It should be done under magenta safe light, such as that from a Portal Industries JJ-668 source.
The front terminal is positive and the greatest output will be obtained when the panel is pointed due south at an elevation of your latitude plus ten degrees. A group of panels can, of course, be wired in parallel for independent, on-site power.
If anyone builds one of these situ solar cells let me know how you get on Geoff
