MAKING A HIGH VOLTAGE STORAGE CAPACITOR
with a simple winding Jig setup

A simple explanation
A capacitor in itís simplest form consists of four layers of differing material
(1) Insulator usually Plastic but can be oiled paper
(2) A conductive surface usually al foil,tin foil or the like
(3) Insulator
(4) A conductive surface
All these layers are placed together somewhat like a sandwich with each directly
above the previous layer.
These layers are then rolled together from end to the other to form a cylinder.
Please note the two seperate metal layers are not in conductive contact with each
other.
Often the lengths of the above material of several feet or more in construction the
model below consists of 30 metre length but a greater length would probably give a
better result.
Normally the home constructor would have to find room to lay these four layers out so
that they could correctly align each layer.
If you donít have the room is this makes things difficult.
That is why I have put together the winding jig below and I hope it gives others the
opportunity to discover the world of high voltage storage capacitors.
Making youself a capacitor or as old timers called it a condenser is an interesting way storing and studying high voltage electricity and this field may also may lead to new discoveries in the free energy field.
Construction usually involves using two lengths of metallic foil and two lengths of plastic and then putting them in a sandwich form and then winding it all together to form a single roll to make a capacitor.
The metal plates are then connected to a charging source and then the fun begins when you try to discharge the capacitor and the large sparking electro flash resulting.
Nicola Tesla likened the effect to that of dynamite and explosive energy released.
NB: THE CHARGE THE CAPACITOR HOLDS CAN BE ENOUGH TO KILL YOU SO PLEASE BE CAREFULLY AND FOLLOW PROPER SAFETY PRECAUTIONS.
ONE SUGGESTED METHOD IS TO SHORT OUT THE TERMINALS WHEN STORING AWAY TO AVOID CHARGE BUILD UP OCCURING NATURALLY
TEST WITH MULTI METER TO SEE IF CAPACITOR HAS A CHARGE ON ITS TERMINAL CONNECTIONS AND DISCHARGE SAFELY BEFORE MAKING ANY CONNEXTIONS TO IT
REMEMBER SAFETY FIRST.
There are several places on the net that tell you how to make one but this using involves using several meters of foil and plastic laid out on a suitable flat surface free from foreign materials.
I don't know about you but I don't have that much free space.
That is why I put together this device that makes the process somewhat simpler and quicker when the jig displayed has been constructed.
I offer no measurements as the design you make will be dependent on the plastic and foil size you use, I hope the following descriptions and the photographs and drawings give you a good idea as to how to make a basic variation yourself.
All you need is some aluminium tubing for rollers all cut to the same exact length
Some additional tubing for supports on top for the plastic and foil supports
Some small bolts that will fit in to the tubing and allow it to rotate freely.
Some MDF particle wood board as shown in diagrams
and twelve pation metal angle supports to mount the wood on and to make the winding support.
I suggest you work out what size you want the wood to be and get lumber or timber store cut it up to size for you when purchasing.
some flat plastic cylinder for mounting on the rollers to keep the plastic and foil in its correct position when being wound.
Give yourself about two days to make the unit.
†You should be able to be make this unit with some simple hardware tools.
The unit consists of a base board and two large side panels and a couple of smaller panels in the front.
It also needs a two upright panels secured to back of the larger panels to hold the large roll containing the plastic at the back of unit. (See photographs and drawings)
I recommend you drill all holes in all side panels when they are clamped together to enable the opposite holes to be correctly aligned.
When assembled all wooden panels are held in placed by means of 8 bolted patio metal support bracket plates. ( a good hardware store should have these )to the baseboard.
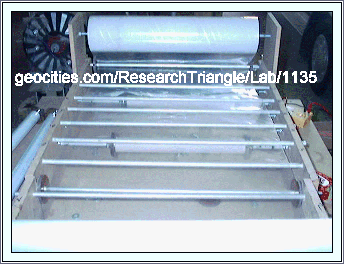
The large plastic roll is held firmly in place by means of a 3/8" threaded length of rod with wing nuts at each end screw to tightly to outside of each wooden upright support.
The actual large plastic roll on the thread is held in the correct place on the actual rod by means of a couple tightened screw hose clamps.
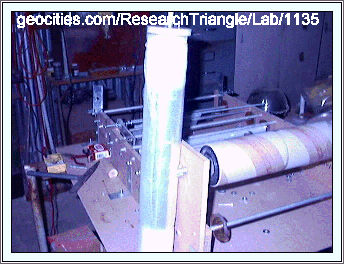
You may need to make a couple of flat plastic cylinders with a centre hole drilled in it to fit on the threaded 3/8" rod and inside the large plastic supply cardboard roll so you can mount and roll unwind it properly.
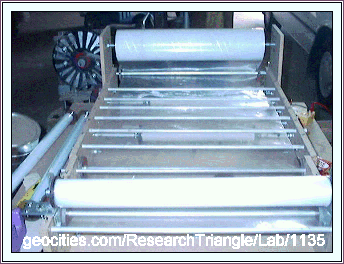
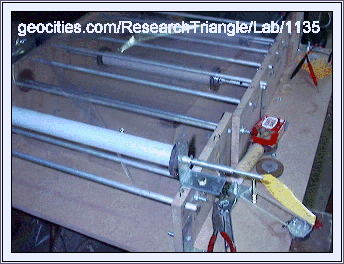
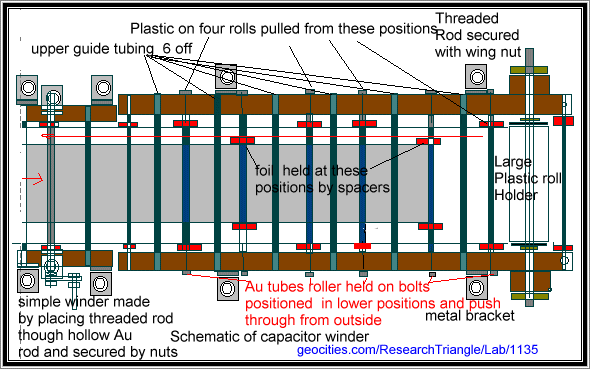
The upper rod guides you see at the top in the photographs are just Al tubing that fits through drilled holes on both sides of just over the outer diameter of the tubing.
The rollers are just some tubing cut to the correct length using a pipe cutter with some plastic flat cylinders cut using a 2inch hole cutter drill attachment attached to the rod by glue to enable the plastic to roll up correctly when winding.
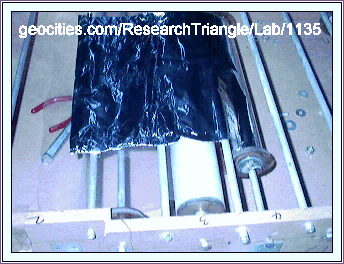
The two AL metal foil rollers are made similarly but also includes two smaller flat cylinders in the central position to hold the cardboard tube on which the aluminium foil is wrapped when purchased.
Slip the cardboard with foil over the smaller cylinders and butt end it against a flat rollers and add another and hold in place with a small hose clamp.
The size of rollers will depend on the width of the plastic roll you have acquired.
When these rollers are made they are held in place by bolts pushed through the wood support panels so don't drill holes too loose our they will drop out.
These AL rollers will just spin around the screwed bolt ends pushed through from the outside of the upright wood panels.
I have placed nuts on one of the bolts to hold them in place ,but found it was not necessary for the other side.
All roller tubing length must be cut as close as possible to zero tolerance.

front view of winding area with winder handle removed and with a piece of extended tube to over the threaded core to bring the handle position past the bracket and allow the handle to be rotated.
The winder support is made by using some patio metal brackets and are bolted together and hole drilled in the upper piece to support the roller tubing.
When the roller for the plastic rewind or capacitor construction is placed in the metal brackets a threaded rod is inserted into the AL tubing and then held in place with a nut each end a simple winding handle is then attached. This will enable you to turn the tubing and take up the plastic
On the larger roll or the 6 separate rolls for capacitor construction.
Placing hose clamps at each end of the AL roller tubing on the outside of the bracket support will prevent it moving and coming out of the supporting brackets while placing plastic on the roller or indeed creating the capacitor itself.
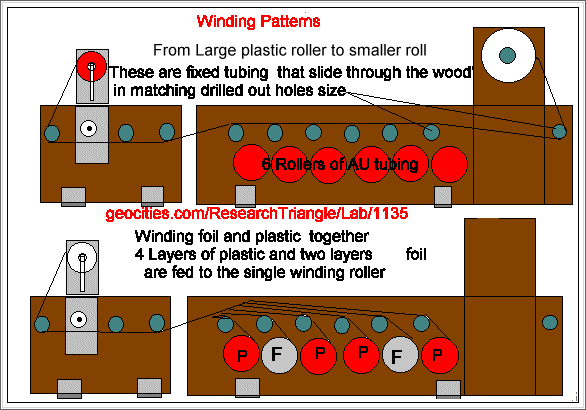
winding position for just winding plastic and for the construction of the capacitor using two foil rolls (AU) lengths and four rolls of plastic matching the same length.
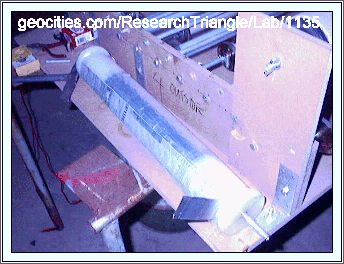
A capacitor can made with two sheets of plastics and two rolls of foil.
I however recommend you use four sheets of plastic as some plastic sheets can be de damaged and will allow the charge to cross over and thus not to build up the power.
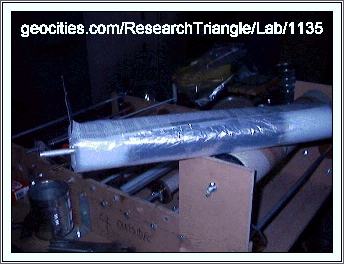
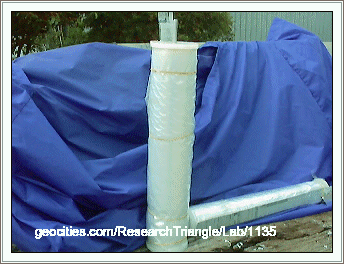
The larger capacitor shown is made using four roll sheets of plastic and two 30 meters of AL foil.
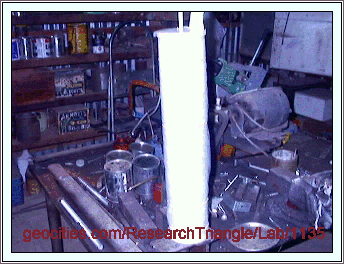
The smaller unit shown is made using only two sheets of plastic and both capacitor windings construction will be placed in PVC tubing and sealed before testing...

I have used the centre metal roller tubing as a connection point to the inner foil surface and used a piece of Al lino type printer sheet as the outer foil connection point.
If you do likewise make sure you don't wind the second foil onto the first foil sheet as a short circuit will result.
†One tip
You might have to turn the larger plastic roll by hand when winding onto the smaller plastic roll take up to stop creases forming in the plastic sheet before being wrapped on the smaller roll.
Making an electrostatic wimhurst machine
The testakica a machine a machine that could work using electrostatic principles
making capacitors using glass and water and more
The Lorente electro static machine simple and excellent
using high voltage and a radio active element for free power.
Hope this has been of help let me know how you get on